

Image credit: Solar Depot
There are many ways to make a weatherproof cable entry to your iron roof, but as far as I’m concerned, all of them except one are wrong. In this post, I’ll explain what 20 years of roofing experience has taught me about making the perfect wiring penetration.
It’s quite simple once you’ve seen the pictures, but as I explained last week, some builders have never been properly schooled on the finer points of waterproofing.
Mechanically Waterproof Is The Key
Building trades always joke that plumbers only need to know two things:
- Shit flows downhill
- Payday’s Thursday.
You’d think electricians would also be across these facts, but sadly, I’ve seen much evidence to the contrary. Not only do they rely heavily on great gobs of silicone sealant, but they are too precious to put their fingers into the sticky stuff and finish it nicely. And the failure to understand condensation inside conduits and wiring enclosures warrants a whole post of its own.
The golden rule is this;
Make your holes in the high part of the roofing sheet,
so the low part can carry the water without leaking.
Examining Flat Roof Failures
Failure #1
Stuck flat in the pan (the low part of a deck profile) with no less than nine screws.
- The red arrow shows the EPDM flashing torn through the reinforcing lip and ready to split further because it’s been hacked open with some side cutters instead of being cut accurately with sharp scissors.
- Covering screw heads to prevent corrosion and insure against leaks is good practice, but failing to remove the barcode means you’re relying on the integrity of a sticky label for sealing.
- The green arrow shows where silicone has been squirted around with a caulking nozzle but not worked into the gaps, finished or feathered at the edges.
You’d be surprised at the number of big, tough tradies who don’t like the feel of sealant on their fingers. Ewww!
People don’t realise that many sealants won’t adhere properly to the surface without expelling air and forcing it to make good contact.
Failure #2
This is a damming indictment on solar installers, pun intended. By blocking the pan, water is stuck with nothing better to do than seep under the sealant & rust the roof.
High Ground Makes Things Happy
Klip Lok, high span, deep rib, and standing seam all describe roofing iron designed for low-pitch roofs. They all have flat sections – or pans – between the ribs.
Just under the edge of the ridge cap, these two conduits emerge from the ribs of a roof sheet. The conduits and screws are up and away from the flat pans.
Klip Lok Should Look Like This
Seal the conduit to the sheet, add some for the flashing to slide over and secure it with screws that never get wet.
Sometimes, you have to blow the water off, but urethane sealant will adhere to damp surfaces, whereas silicone won’t.
Some trades will argue that sawing holes through the rib weakens the sheet and makes it less able to carry foot traffic, so I put them near the roof purlins for support anyway. Ideally, it would help if you weren’t walking near flashings, in box gutters or where there are known weak points.
I only had 450mm headroom to work on these.
Corrugated Iron Shouldn’t Look Like This
There were/are small, oval-shaped flashings made for exactly this purpose, but most common these days are the 100mm square style, which sadly gets installed square to the profile with screws fired through it everywhere:
Blue shading shows where water pools and dirt collects, while 6 out of 8 screws are in the wrong place.
Water pooling above these flashings is an unnecessary liability:
Blue shading shows where water sits because the flashing prevents it from draining away.
Better Flashing Placement; Diamonds Are Forever
Remember the plumber’s mantra: shit flows downhill. By ensuring there’s nowhere for water to sit, you’ll minimise the chance of leaks, dirt buildup and corrosion.
Installing screws on the highest points means water can flow straight past them.
By filling the lower part of the corrugated profile, there’s no recess for the water to sit in and no way it can seep under the edge of the flashing.
I have formed a continuous downward slope with urethane sealant, working it into the surface with little circular finger motions to make it stick. Screws get covered next.
Water and the dirt it’s carrying are unimpeded here.
My Own House Looks Like This
Start with a measured amount of urethane sealant on a flashing already formed to fit the corrugations:
Sealant makes a good lubricant on the conduit until it sets.
Set it in place with a saddle to hold the conduit while the sealant goes off. Using rigid conduit meant this was bent first, marked and trial fitted before breaking out the caulking gun full of mess:
When everything fits nicely, you don’t need screws in to keep it there.
Finally, add some more sealant to fill the low spots. Feather the edges out to finish it off and create continuous fall. Yes, this conduit is going uphill.
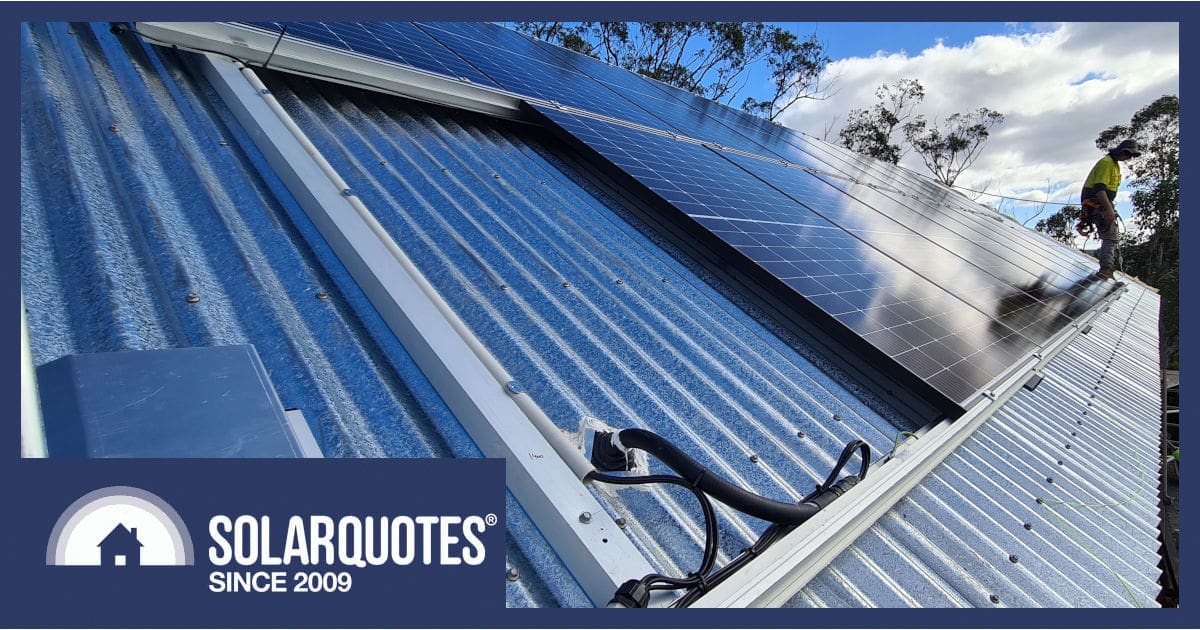
From our cover image, this bushfire-rated job required plastic-coated metal conduit (anaconda) and gaps of no more than 1mm anywhere.
You’re Welcome To Share
After 20 years on the roof and no instruction from TAFE on the subject, I genuinely hope this helps make better installations.
Show this to anyone you know is dull enough to find it interesting, and if they have an argument against it, please leave a comment; I promise it’ll be ignored in due course.
Next week, we’ll touch on tile roofs and how not to wreck them with wiring.
Comments are closed.